
Here's how OpenAI Token count is computed in Tiktokenizer - Part 4
In this article, we will review how OpenAI Token count is computed in Tiktokenizer. We will look at:
-
Text preview
-
Token IDs preview
Text preview
When you write some message in https://tiktokenizer.vercel.app/, this application gives you the token count and also gives you a preview of text and the text IDs as shown in the following image.
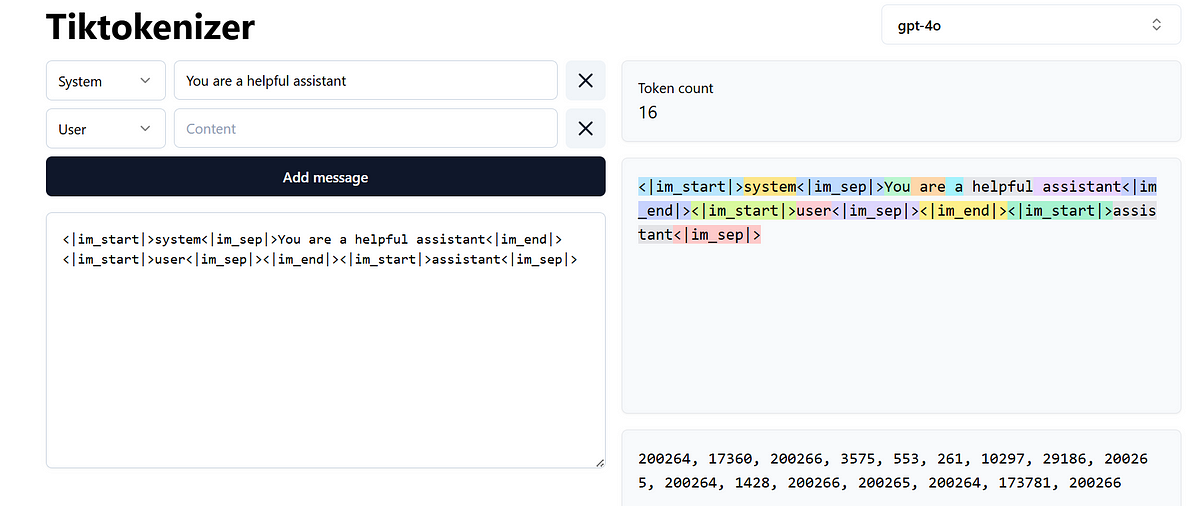
You want to find out how this text preview is rendered?
At line 67, you will find the following code:
<pre className="min-h-[256px] max-w-[100vw] overflow-auto whitespace-pre-wrap break-all rounded-md border bg-slate-50 p-4 shadow-sm">
  {props.data?.segments?.map(({ text }, idx) => (
    <span
      key={idx}
      onMouseEnter={() => setIndexHover(idx)}
      onMouseLeave={() => setIndexHover(null)}
      className={cn(
        "transition-all",
        (indexHover == null || indexHover === idx) &&
          COLORS[idx % COLORS.length],
        props.isFetching && "opacity-50"
      )}
    >
      {showWhitespace || indexHover === idx
        ? encodeWhitespace(text)
        : text}
    </span>
  ))}
</pre>
This code above renders the UI shown in the following image and this is text preview.
This uses segments array to colourise the text.

Token IDs preview
In this section, we will look at the text IDs preview.
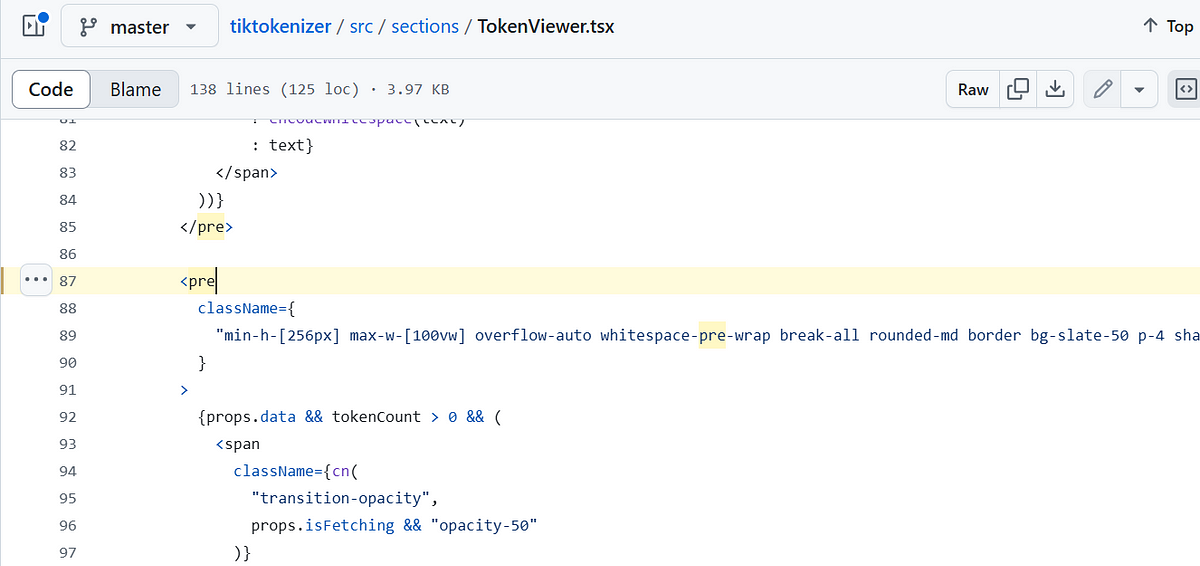
At line 87, you will find the below code:
<pre
  className={
    "min-h-[256px] max-w-[100vw] overflow-auto whitespace-pre-wrap break-all rounded-md border bg-slate-50 p-4 shadow-sm"
  }
>
  {props.data && tokenCount > 0 && (
    <span
      className={cn(
        "transition-opacity",
        props.isFetching && "opacity-50"
      )}
    >
      {props.data?.segments?.map((segment, segmentIdx) => (
        <Fragment key={segmentIdx}>
          {segment.tokens.map((token) => (
            <Fragment key={token.idx}>
              <span
                onMouseEnter={() => setIndexHover(segmentIdx)}
                onMouseLeave={() => setIndexHover(null)}
                className={cn(
                  "transition-colors",
                  indexHover === segmentIdx &&
                    COLORS[segmentIdx % COLORS.length]
                )}
              >
                {token.id}
              </span>
              <span className="last-of-type:hidden">{", "}</span>
            </Fragment>
          ))}
        </Fragment>
      ))}
    </span>
  )}
</pre>
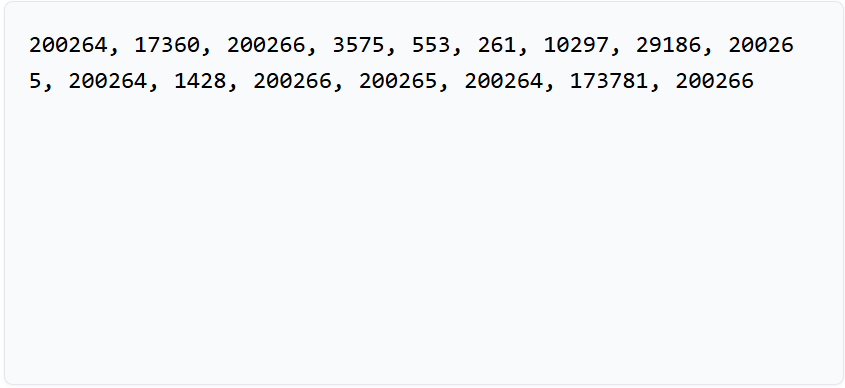
This code above renders the UI shown in the following image
About me:
Hey, my name is Ramu Narasinga. Email: ramu.narasinga@gmail.com
Tired of AI-generated code that works but nobody understands?
I spent 3+ years studying OSS codebases and wrote 350+ articles on what makes them production-grade. I built an open source tool that reviews your PR against your existing codebase patterns.
Your codebase. Your patterns. Enforced.